Diagram of bonding gutter in a roof

What are bonding gutters?

A bonding gutter refers to a detail, which weathers the vertical junction between different roof coverings. For example, between a double lapped plain tile and a single lapped large format interlocking tile. The detail can be formed using preformed polymer based products, traditional lead work or more modern lead replacement flashings. This detail is most commonly seen on semi detached and terraced properties, whereby one homeowner wants to replace their roof tiles. A bonding gutter is required to weather the junction between the existing tiles on the neighbouring properties and the new roof covering.

How to Weather the Junction

Where two different tiles meet at a boundary they often do not interlock with each other, creating a gap in the tiles in which water can enter the roof space. It is important that a bonding gutter be detailed at this point to collect and drain any water entering at this junction. It is common to see a mortar bedded covering over the joint where the two tiles meet. However, this is rarely successful or adequate. The integrity of the joint relies on the mortar bedding, so even if it is waterproof to start with, will inevitably start to leak as soon as any small crack appear in the mortar.

Typical Bonding Gutters

Drawing No 1 shows a typical bonding gutter detail using a lead-lined drainage channel at the junction between the two roof coverings.  In this detail, the lead lining carries over vertical battens, finishing in welts at each side.  By limiting the gap between the two roof coverings to no more than 15mm, there is no need to use mortar to close the gaps between the tiles to prevent access to birds and rodents.

Drawing No 2 shows a preformed bonding gutter installed at the junction between two roof coverings. In this detail, the preformed piece simply sits over the tile battens and firebreak. The tiles at either side are finished close to the upstand to close the gap between the tiles. The advantage of this type is that there is no need for any mortar bedding. 

Bonding Gutters Installation Tips

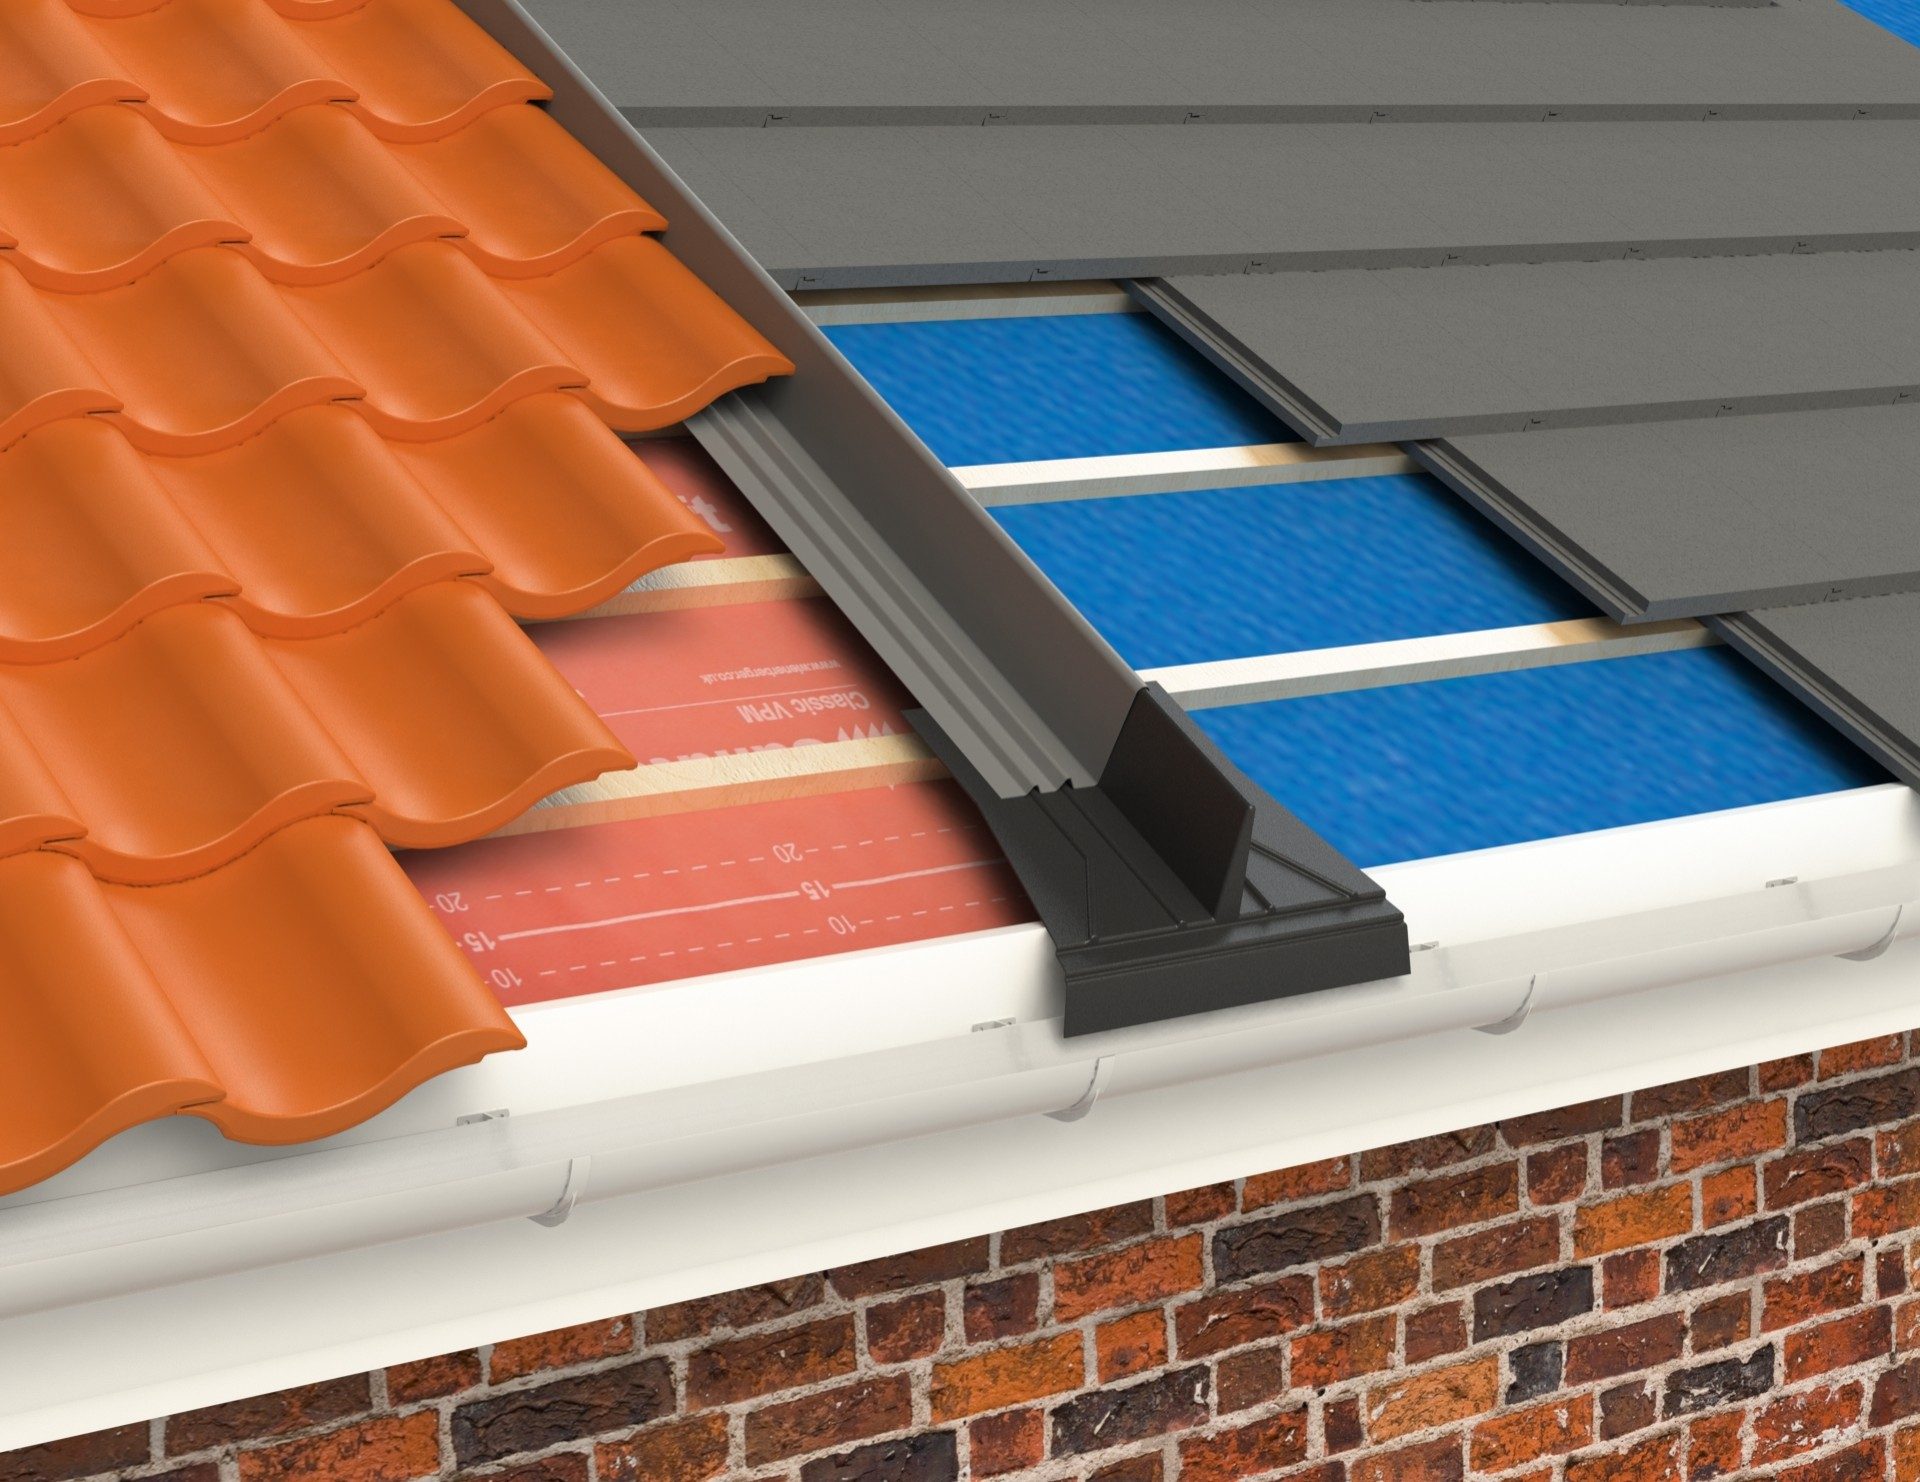
When installing the tiles abutting the bonding gutter it may be necessary to remove tile nibs to enable the tiles to sit close over the bonding gutter upstands.  It is also a good idea to use screws to secure the edge tiles, making sure the fixings do not penetrate the gutter lining, of course.  Screws make it easier to pull the tiles closer to the battens, further reducing the amount of possible ‘kicking’ over the gutter upstands.

One of the biggest issues when installing bonding gutters is not the technical installation itself, but the disputes between neighbours regarding boundaries. Bonding gutters are normally positioned over the party wall between properties, combining with a firebreak detail, however this does not have to be the case. If there is a dispute regarding this, the bonding gutter can be installed on your side of the party wall to avoid a disagreement.

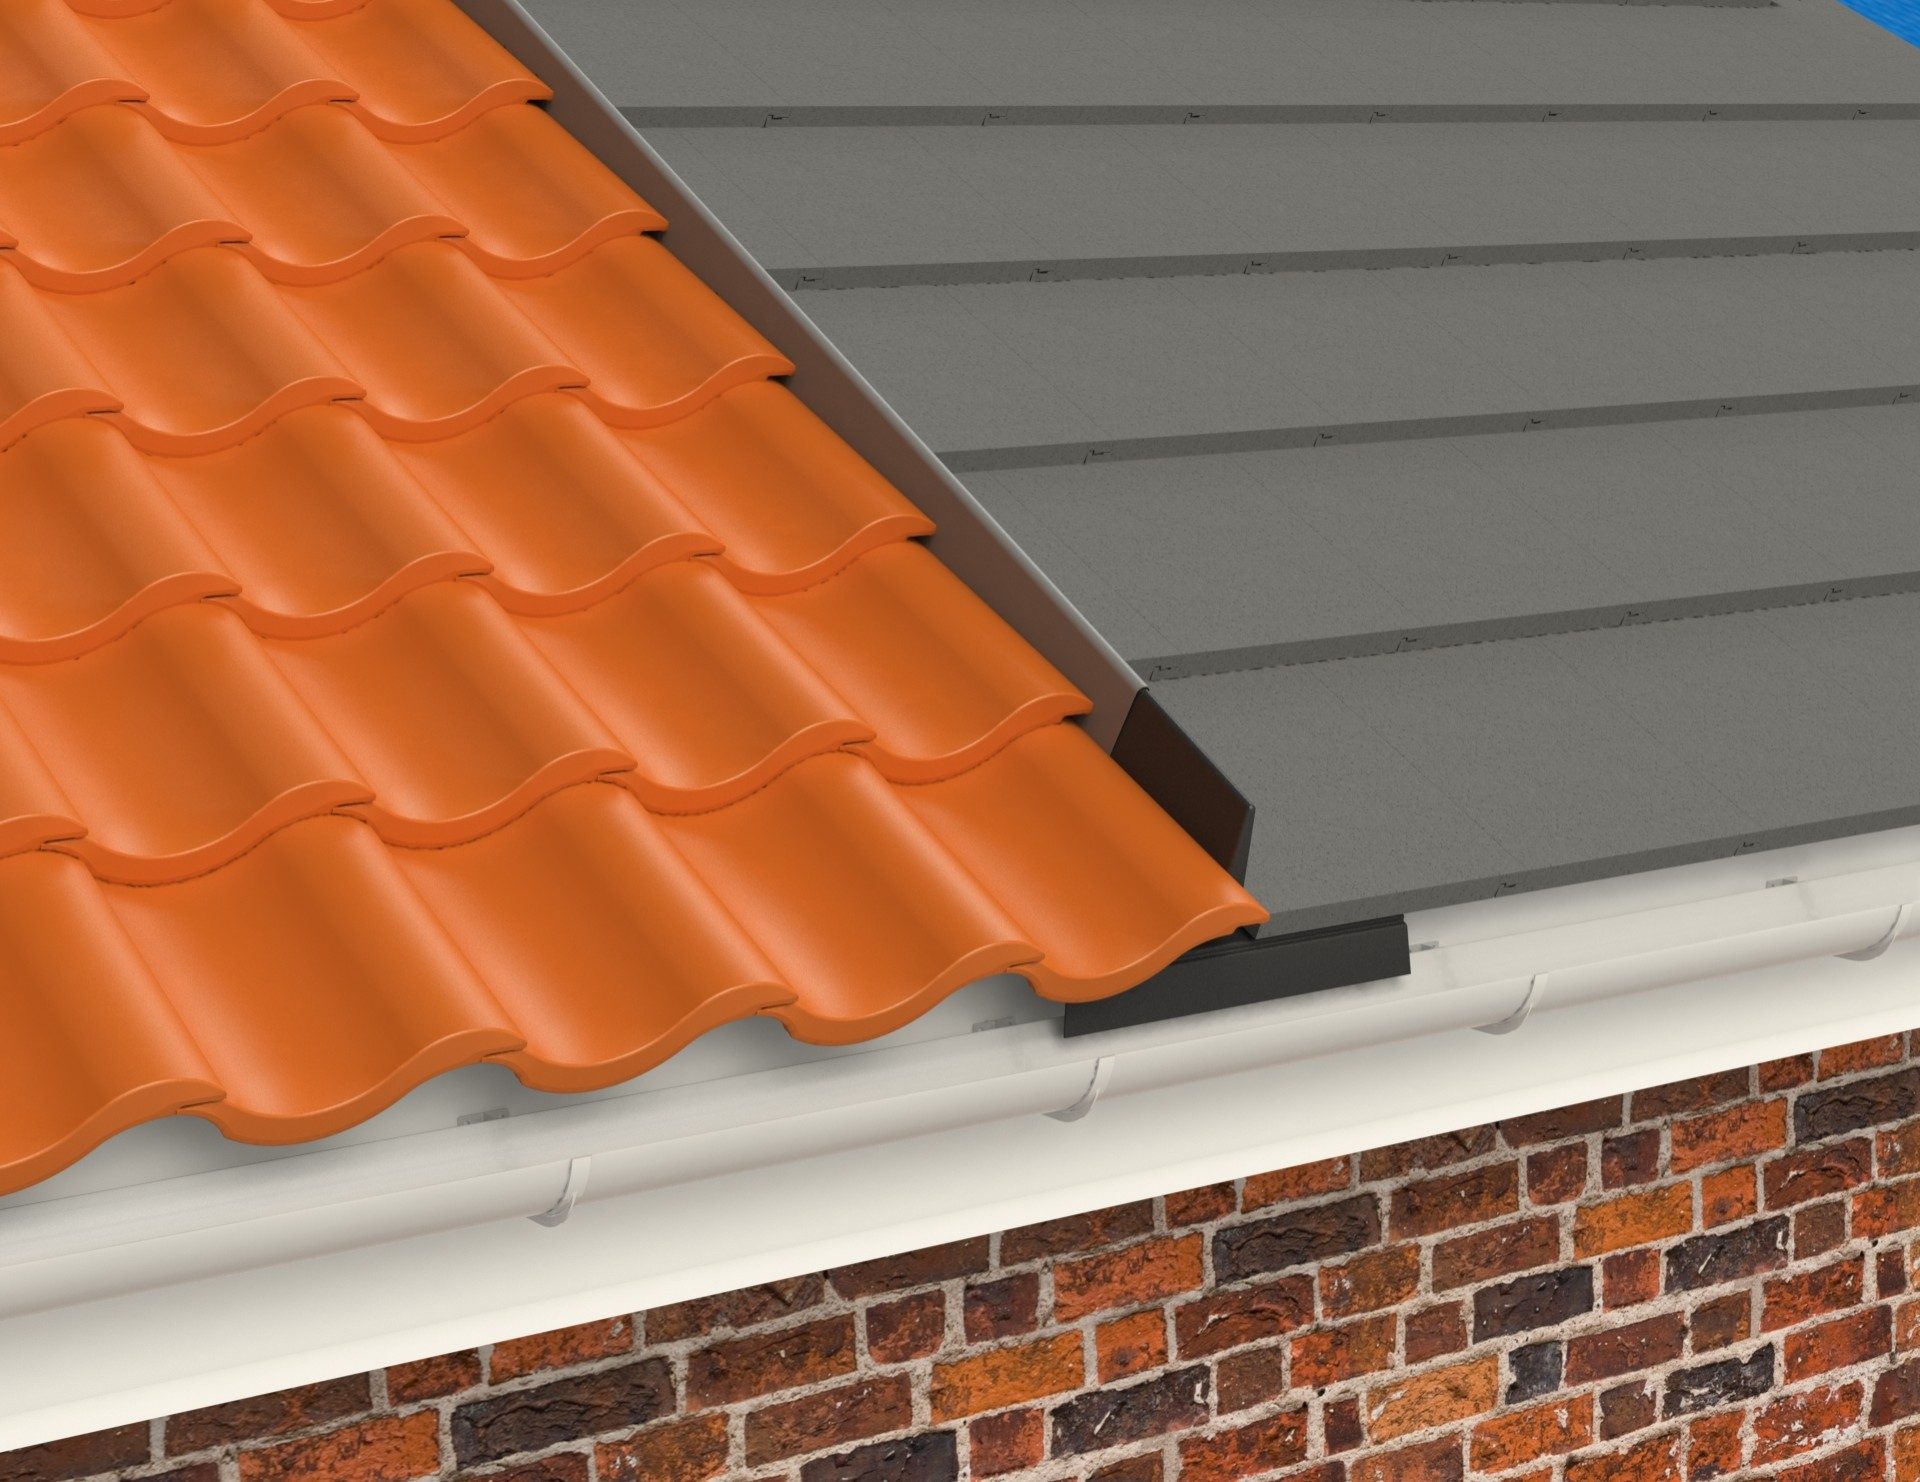
Anyone about to install a new roof adjoining a neighbour should first talk with their neighbour to explain and agree upon the installation process. If you have to install the bonding gutter wholly on your side of the roof then it is recommend you use the detail shown earlier in drawing number 2, as there is no need for any additional structure support for the bonding gutter itself.

What are the commonly asked questions in roof fixings?


What are the risks of using reclaimed roof tiles?


What are the considerations for low-pitch roofs?


Modern tiled roof and gable end

Discover the UK's largest roof tile range

Browse roof tiles and accessories, order a sample, or get in touch to discuss your next project.

Downloads

Search now to download product information, technical guides, brochures and more

Contact

Got a question? Send us a message and we'll be in touch to help.

Stockists